Cuando escribí sobre el anuncio de Chanel n°5 aquí no pensaba en encontrar en el super el Gel detergente y el tónico al Agua de Rosas de la casa farmacéutica H.Roberts de Florencia. He sido incapaz de encontrar la pagina web, y quien sabe si se vende fuera de Italia, espero vivamente que así sea por que es fantástico.
_______ _______
When I wrote aboutthe adfor ChanelNo. 5hereI did not thinkto findinthesupermarketthe cleansing geland the tonicRoseWaterfrom the pharmaceutical companyH.Robertsof Florence.I have beenunable to findthe site,and who knowsif it is soldoutside of Italy, I hope it sostronglybecauseit's fantastic.
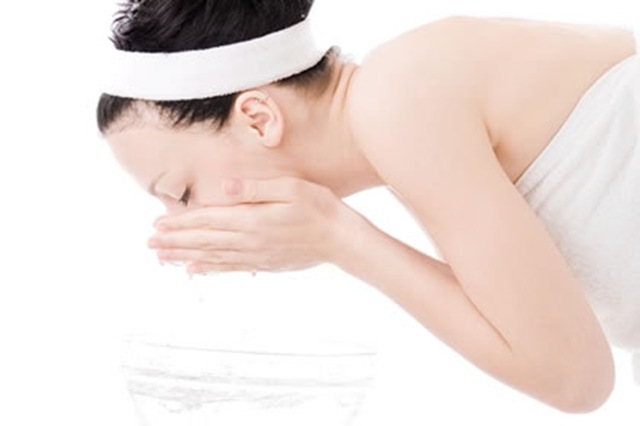
Más tarde leí este truco: Lavarse la cara dos veces. No sólo lavarse la cara mañana y noche, que también hay que hacerlo, no. Dos veces por la noche. ¿Por qué? Porqué con la primera te desmaquillas, y con la segunda, además de eliminar el maquillaje que podía quedar, eliminas las impurezas.
_______ _______
Later I readthis tip:Wash your facetwice.Not onlywash your facemorning and night,that you also have todo, no.Twice anight.Why?Becausewith the firstremove your make upyouandwith the second,in addition to removingmakeup thatcouldremain,you remove the impurities.
Bien, deciros que funciona. No sé si es por el Agua de Rosas, porqué me recuerda a mi abuela, por el lavarme la cara dos veces o porqué hay una conjunción planetaria que mejora mi piel, pero yo he notado el cambio. Siempre he tenido la piel grasa en la famosa zona T, la famosa piel mixta (más mona ella...). Tengo pocas arrugas a pesar de mis casi 40 (¡¡ole la genetica!!), pero siempre he tenido los tipicos granitos pre-menstruacion. Bien, desde hace 2 meses, que es desde cuando utilizo el metodo "double-clean" (yo lo llamo así), no he tenido ningún granito, la piel de las mejillas no me tira después de lavarme la cara y tengo la piel en general más luminosa. Que vaya a ser este el truco...
_______ _______
Well,saythat it works.I do not knowif it's theRose Water, becauseit reminds memy grandmother,forwashing my facetwice orbecause there is aplanetary alignmentthat improvesmy skin,but I havenoticed the change.I've always hadoily skinin the famousT zone,the famousmixed skin(cutest...).I havenot many wrinklesin spite of myalmost40 (olegenetics!), But I alwayshad thetypicalpre-menstruationpimples.Well, for2 months, which is fromwhen I usethe method"double-clean" (I call it like),I had nopimplesthe skinof my cheeksdoesn't strip afterIwash my faceand I have theskinin generalmore luminous.Maywillthis be thetrick...
Todos conocemos las lamparas de papel, muchos de nosotros la hemos tenido en alguna habitacion de nuestra casa, pero dan esa imagen de anonimato, de provisionalidad
He encontrado varios proyectos para hacer con las famosas lamparas, os pongo solo las fotos por que son muy explicativas. Basicamente necesitais una lampara de papel del tamaño que querais, una pistola de silicona y un poco de paciencia.
_______ _______
Everybody knows thepaper lanterns, manyof us havehad one inanyroomof our house,but they givethat image ofanonymity,of provisionality.
I have found severalprojects to dowith the famouslamps,I putyouonly photosbecauseareself explanatory.Basicallyyou need alampof paper the sizeyou want,aglue gunand somepatience.
Ya conoceis mi obsesion por el pelo largo, sobretodo por el mio.
Hace algun tiempo había "postado" (del verbo postar ^___^) un peinado desde el blog de Joanna Goddard y hoy os dejo otro ejemplo.
Me gusta por que es sencillo de hacer y aunque yo tenga que esperar al menos un par de años para poderme permitir una cosa parecida no quiere decir que las melenudas que lean mi blog no puedan utilizar sus trucos.
_______ _______
You know myobsession withlong hair,especially by themine.
Some time ago, I posted a hairstylefromJoannaGoddard's blog and todayI leave youanother example.
I like it becauseit is simple todo andalthough Ihave to waitat least a coupleof yearsto couldallowsomething like thatdoes not meanthatthe hairywho readmyblogcan not usetheir tips.
1. Hacerlo con el pelo de un día... lo que significa que ha pasado un día desde que lo has lavado. (Si debes lavar el pelo, luego puedes utilizar un spray para dar volumen. Y si tu cabello es graso, usa un champú seco para construir el cuerpo y la textura). Ahora hazte una raya lateral, puedes usar un peine con una pua metalica para obtener una raya recta. 2. Cardar el ultimo cuarto de la parte alta del pelo. Basicamente debes cepillar el pelo hacia abajo hasta que quede de pie por si mismo. 3. Cepilla suavemente una capa de tu cabello para que sea suave en la parte superior. El cardado se debe ocultar debajo de esta capa. Ten en cuenta que no debes cepillarlo demasiado liso, lo que se desea es un efecto desordenado. 4. Recoge toda la seccion del cardado y fijalo en la parte de atras de la cabeza con algunas horquillas formando una "X"
5. Recoge todo el pelo en una cola baja. Apretar la goma de pelo al maximo, esto te ayuda a "empujar" el pelo hacia arriba creando más volumen en la parte superior. 5. Puedes dejar la goma expuesta o ocultarla cogiendo un mechon de pelo de la cola y envolviendolo alrededor de la goma fijandolo con una horquilla.. 6. Despeina la cola con los dedos para que se parezca a la de la parte superior de la cabeza haciendo el mismo movimiento de abajo a rriba. Recuerda, este peinado no busca la perfección, se ve mejor un poco despeinado.
_______ _______
1. Start with day-old hair...meaning it's been a day since you've washed it. (If you must wash your hair, then use a volumizing spray to add oomf; and if your hair is oily, use a French dry shampoo to build body and texture.) Now make a deep side part on one side of your hair. You can use a rat-tail comb to get an extra straight part.
2. Backcomb the top quarter of your hair. Basically, brush the hair downwards toward your scalp so it's sort of frizzy and can stand on its own.
3. Gently brush the very top layer of your hair to make it smooth on the top. That way, all the backcombing will be hidden under the layer that you brushed. Still, don't brush too much, you want it a little messy.
4. Take the entire backcombed section and pin it behind your head. To make it secure, place the bobby pins in an "X."
5. Now take all your hair and put it in a low ponytail at the nape of your neck. Tighten the rubber band as tight as you can. This will help "push" your hair up, creating more volume at the top.
5. You can either leave the rubber band exposed, or hide it by taking a small half-inch section of hair from the ponytail and wrapping it around the rubber band. Take a small bobby pin and pin the hair to the rubber band.
6. Rough up the ponytail with your fingers to match the texture at the top of your hair. Use the same motion as you did to back comb, but use your fingers instead, since this will create a messy texture but will be softer and gentler than using a comb. Remember, this look isn't about perfection; it looks best slightly messy.
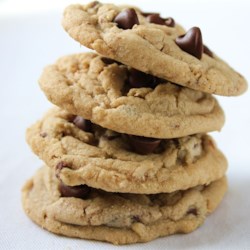
En mi primer viaje a New York (en el lejano 1992) comí montones de estas, tan buenas, blanditas... Y obviamente me llevé la receta para Barcelona. ¡¡¡Me encantan!!!
_______ _______
On my first tripto NewYork (in the far 1992)I atelots ofthese,so good, so chewy...And obviouslyI took therecipe toBarcelona. I love them!
Ingredientes para dos docenas
115 gr. mantequilla
100 gr. margarina 165 gr. azucar moreno 100 gr. azucar blanco 1 huevo 5 ml. de extracto de vainilla 5 gr. de levadura 1 pizca de sal 250 gr. de chips de chocolate amargo 250 gr. de harina
Realización
Precalentar el horno a 175°C Mezclar la harina, la levadura y la sal en un tazón. En otro tazón, mezclar la mantequilla y la margarina a temperatura ambiente con el azucar blanco el azucar moreno y la vainilla.
Batir hasta que quede cremoso. Añadir y batir con el huevo. Poco a poco agregar la mezcla de harina, sal y levadura y mezclar bien. Añadir el chocolate y mezclar.
Colocar a cucharadas separadas en una bandeja cubierta con papel de horno. Hornear de 8-10 min.
Nota: ¡Sacar del horno antes de que empiecen a ponerse oscuras!
_______ _______
Ingredients for two dozens
1/2 cup butter
1/2 cup shortening
3/4 cup packed brown sugar
1/2 cup white sugar
1 egg
1 teaspoon vanilla extract
1 teaspoon baking soda
1/4 teaspoon salt
1 1/2 cups semisweet chocolate chips
2 cups all-purpose flour
Method
Preheat oven to 350 degrees F (175 degrees C).
Combine flour, baking soda and salt. In another bowl, combine soften butter with shortening, sugar and brown sugar and vanilla. Beat until creamy. Beat in egg. Gradually add flour mixture and mix well. Stir in chocolate chips.
Bake on ungreased cookie sheet for 8-10 min.
Note: I take them out of the oven before they start to turn dark!
Lo reconozco, ultimamente me está obsesionando la purpurina. Los que me conoceis desde hace tiempo en este momento debeis estar pensando: ¡¡¡Sal del cuerpo de mi amiga!!! ^___^
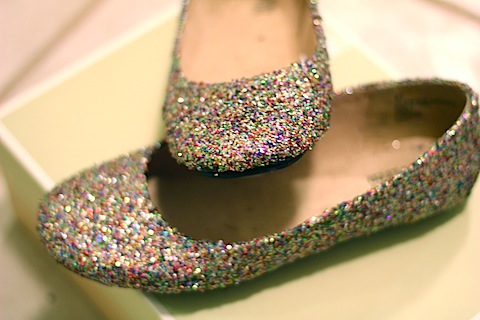
Y después de esta confesión... Bailarinas purpurinosas!!
Hace tiempo que me "las pienso" pero nunca me atrevo a comprarlas, pienso: ¿Cuando te las vas a poner? ¿Merece la pena? Las respuestas son simples: Poco y No. Pero...
Pero luego en los miles de blogs que tengo en mi reader me aparece esto:
Make Your Own Glitter Flats
Y claro, esto ya no tiene marcha atrás...
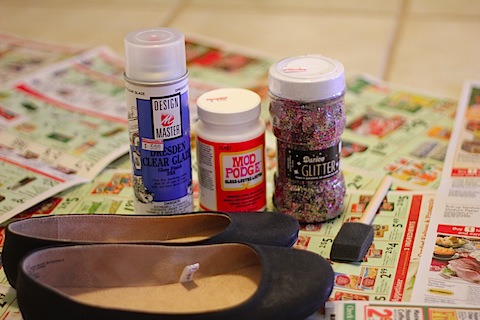
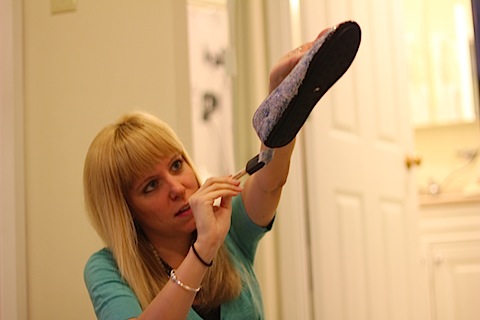
Lo primero, las bailarinas: Lo mejor es reciclar esas que son taaaaan comodas pero que estan taaaaaaaan hechas polvo. Las querias tirar, pero claro, son tan comodas... Esas nos va a venir la mar de bien.
Ya tenemos las bailarinas. Ahora necesitamos el Modge Pod , que obviamente por estas parte ni sabemos lo que es. He encontrado sistemas de como hacerlo aquí y aquí y parece que es una mezcla de cola vinilica (la cola blanca de cuando ibamos al cole) y agua.
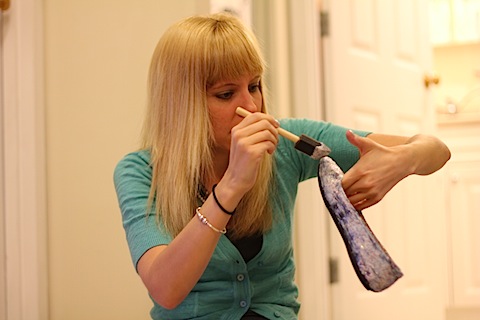
Purpurina, pincel de espuma y barniz transparente en spray.
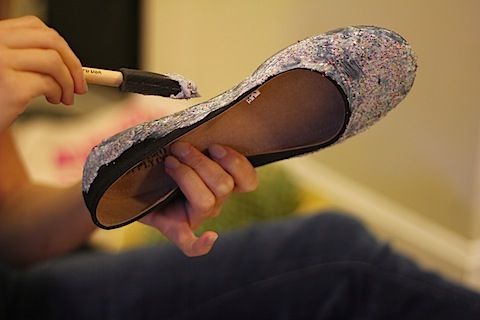
Mezclamos la cola blanca con la purpurina y la aplicamos a la bailarina con una pincel de espuma. Dejamos secar y aplicamos otras 3 capas dejando secar entre ellas (si, lo sé, un poco largo...) Cuando se ha secado la ultima capa, es necesario darles una buena capa de barniz incoloro para fijar la purpurina y no correr el riesgo de ir perdiendola por el camino.
En cualquier caso creo que lo mejor es barricarse dentro de una habitación donde no nos importe tener cierta cantidad de purpurina por un poco de tiempo...
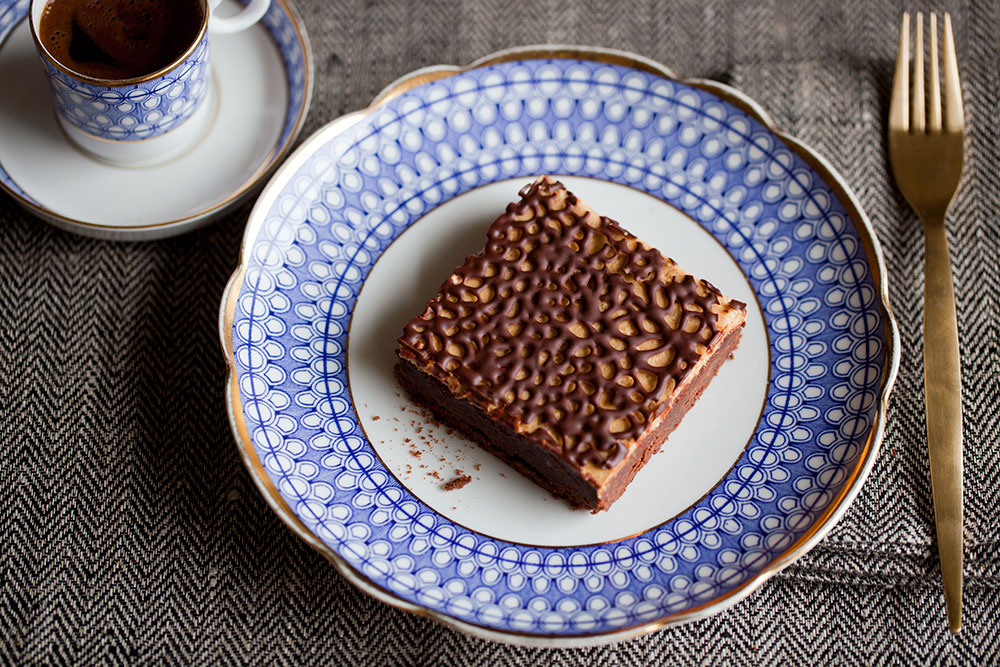
Me encantan los Brownies, tan chocolatosos... Buscaba la ocasión para postar la receta, y hoy he encontrado la excusa perfecta: dia lluvioso + esto:
_______ _______
I loveBrownies,suchchocolate ...I was lookingthe momentto postthe recipe, andtoday I foundthe perfect excuse:rainy day + this:
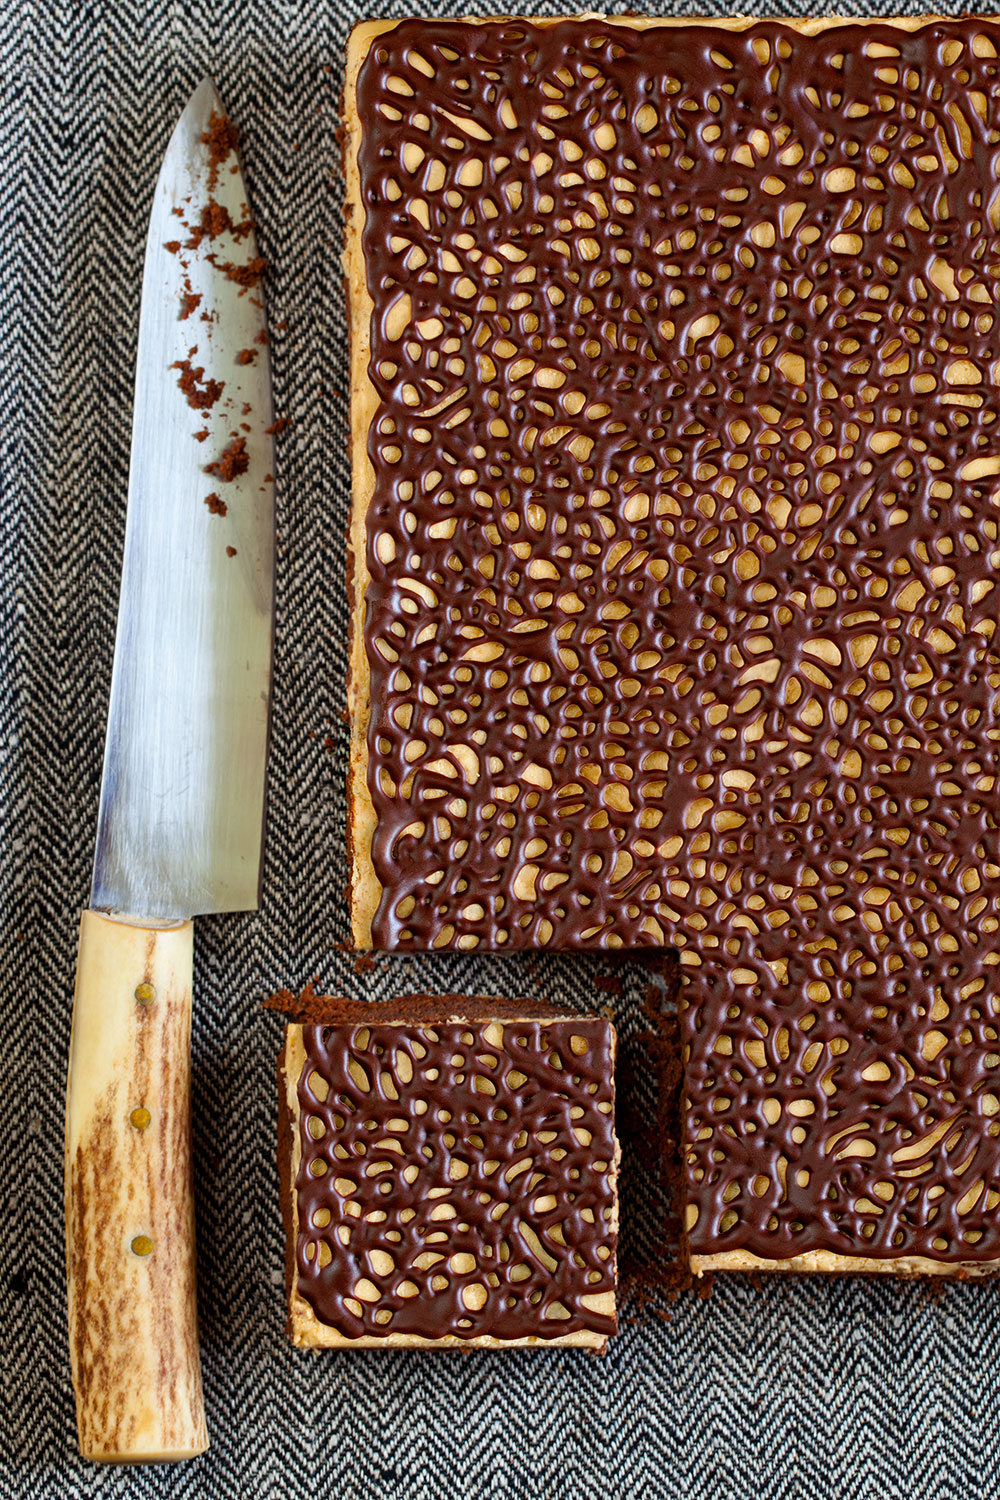
La receta la he encontrado en Café Fernando . Cenk es un food-blogger turco que empezo su aventura blogger en 2006 y que ha tenido un existo grandioso. Menciones en el New York Times o el Washington Post le han dado la posibilidad de publicar un libro de cocina y de recibir una llamada para crear una receta para la revista digital de Dolce&Gabbana Swide.
Un Brownie con una cobretura de encaje de chocolate inspirada en las colecciones de moda. Ingenioso, ¿verdad?
_______ _______
I found therecipeat CafeFernando.Cenkis aTurkishfood-blogger that began his bloggerin 2006and who hasbeenagreatsuccess. Mentionsin The NewYorkTimesor the WashingtonPosthas given himthe possibility of publishinga cookbookand receive acall to create arecipe for a digitalmagazineby Dolce & GabbanaSwider.
ABrowniewithchocolatelacecoatinspired by thefashion collections.Ingenious, right?
BROWNIES con MANTEQUILLA DE AVELLANAS y ENCAJE DE CHOCOLATE
Ingredientes
Para los Brownies:
300 gramos de chocolate amargo picado (70% cacao)
150 gramos de mantequilla sin sal, más un poco para la bandeja
1.Para hacer los brownies, ajustar la rejilla en el centro del horno y precalentar el horno a 175 ° C. Untar con mantequilla un molde rectangular de 23x33 cm, poner papel de horno en el fondo y los lados y dejar de lado.
2.Derretir los trozos de chocolate y la mantequilla al baño maria, removiendo con frecuencia. Dejar enfriar durante 10 minutos.
3.Tamizar juntos la harina, el cacao y la sal en un tazón mediano y reservar.
4.Batir con la batidora los huevos y el azúcar hasta que esté suaves y esponjosos. Agregar el chocolate enfriado y el extracto de vainilla, y batir hasta que se mezclen. Incorporar la mezcla de harina y el cacao con una espátula. Verter la mezcla en el molde, alisar la parte superior con una espátula y hornear durante 30 minutos.
5.Dejar enfriar en el molde durante unos minutos, desmoldarlo y dejar enfriar completamente sobre una rejilla. Recortar la parte superior y un centimetro de cada lado y meter en la nevera hasta que esté frío, más o menos unos 30 minutos.
6.Para hacer la glasa de mantequilla avellana, coloque la mantequilla de avellana en un pote pequeño a fuego lento y remover hasta que esté líquida. Verter sobre el brownie enfriado, alisar la parte superior con una espátula, volver a meter el brownie en la nevera hasta que enfríe completamente, durante aproximadamente una hora.
7.Para hacer la decoración de encaje de chocolate, derretir lentamente los trozos de chocolate al baño maria, removiendo con frecuencia. Deje enfriar durante 10 minutos.
8.Colocar un papel de pergamino de 40 cms de largo en la superficie de trabajo. Dibujar un rectangulo de 20x30 cms con un lápiz (o un poco más pequeño de la medida de vuestro molde), darle la vuelta y colocarlo en una bandeja de horno. Vierta el chocolate derretido en una manga pastelera equipada con una punta normal de las más pequeñas (alrededor de 1 milímetro) y dibujar con el chocolate de la manga pastelera el encaje del tamaño del rectangulo dibujado (podeis crear el dibujo quando diseñais el rectangulo y seguirlo con el chocolate en la manga pastelera, creo que será más fácil). Colocar la bandeja para hornear y una espátula grande (este es el truco) en la nevera y esperar hasta que el chocolate se endurezca, durante aproximadamente una hora.
9.Pasar el brownie en el plato de servir. Retirar la decoración de chocolate de la nevera y con la ayuda de la espátula enfriada pasandola por debajo de la decoración, recogerlo y colocarlo en el brownie. Calentar la hoja de un cuchillo de grandes dimensiones con una soplete de cocina o en una taza de agua caliente durante unos minutos (el calentamiento de la hoja de ayuda con el corte a través de la decoración de chocolate sin que se rompa en pedazos), limpiar el cuchillo, cortar el brownie en 12 cuadrados iguales y servir.
_______ _______
ROWNIES with HAZELNUT BUTTER and CHOCOLATE LACE Ingredients
For Brownies:
1. To make the brownies, adjust the oven rack to the center of the oven and preheat the oven to 350°F/175°C. Butter a 9-by-13-inch rectangular cake pan, line bottom and sides with parchment paper and set aside.
2. Place the chopped chocolate and butter in the top of a double boiler set over hot water and allow to melt slowly, stirring often. Set aside to cool for 10 minutes.
3. Sift together the flour, cocoa, and salt into a medium bowl and set aside.
4. In the bowl of an electric mixer fitted with the whisk attachment, whisk eggs and sugar until light and fluffy. Add the cooled chocolate followed by the vanilla extract, and whisk until combined. Fold in the flour and cocoa mixture with a spatula. Pour the mixture into the baking pan, smooth the top with a spatula and bake for 30 minutes.
5. Allow to cool in the pan for a few minutes, then turn out and leave to cool completely on a wire rack. Trim the top crust and half-an-inch from each side and place in the refrigerator until chilled, for about 30 minutes.
6. To make the hazelnut butter frosting, place the hazelnut butter in a small pot over low heat and stir until it is runny. Pour over cooled brownie, smooth the top with a spatula, place the frosted brownies in the refrigerator and chill completely, for about an hour.
7. To make the chocolate lace decoration, place the chopped chocolate in the top of a double boiler set over hot water and allow to melt slowly, stirring often. Set aside to cool for 10 minutes.
8. Place a 16-inch-long parchment paper on your work surface. Draw an 8-by-12 inch rectangular with a pencil (or slightlysmaller thanthe measure of yourpan), turn the other side and place it on a baking tray. Pour the melted chocolate into a piping bag fitted with the smallest (about 1 millimeter) plain tip and pipe the lace decoration the size of your brownie
(you cancreate the drawingwhen designing therectangleand follow itwith the chocolate inthe pastry bag, I think it will be easier). Place the baking tray together with a large offset spatula (this isthe trick) in the refrigerator and wait until the chocolate is set, for about an hour.
9. Transfer the brownie on your serving plate. Remove the chocolate decoration from the refrigerator and with the help of a large chilled offset spatula go underneath the decoration, pick it up and place it on the brownie. Heat the blade of a large knife with a heat gun or stick it in a cup of hot water for a few minutes and then wipe off the water (heating the blade helps with cutting through the chocolate decoration without breaking it into pieces), cut the brownie into 12 identical squares and serve.
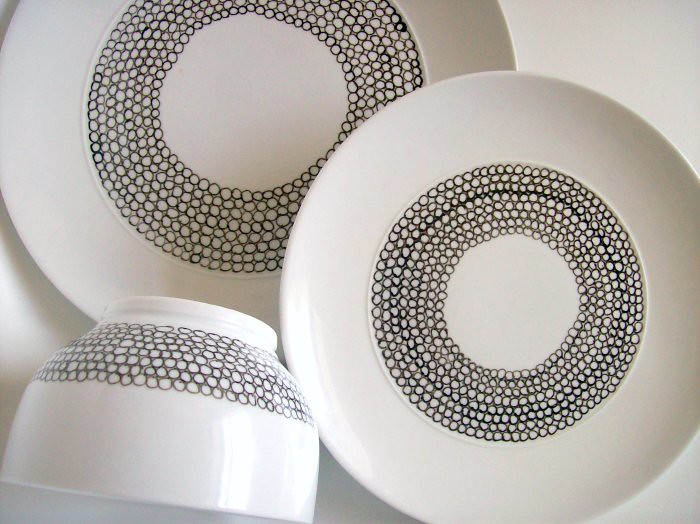
Coges una bonita y simple vajilla en porcelana blanca, buscas un diseño que te guste, haces una plantilla o dibujas a mano alzada con un rotulador para porcelana, lo metes en el horno a 180° por 35 minutos (dependiendo del fabricante) y te queda una vajilla de lo más original.
Me ha gustado este diseño de A Merry Mishap pero en el web puedes encontrar miles de ideas, sólo hay que dejar correr la imaginación...
_______ _______
You takea nice andsimplewhite porcelaindishes, find adesign you like, make astencil ordrawfreehand with a porcelain pen, you putin the oven at300 degreesfor 35 minutes(depending on manufacturer) and youwill havethe mostoriginaldinnerware.
Ilike thisdesign ofAMerryMishapbuton the webyou can find thousands ofideas,just have toletyour imagination run wild...
Necesitais esmalte de uñas de un color claro (esto es cosecha propia por que imagino que con un color oscuro no se veran las letras), recortes de papel de periodico, alcohol (el ejemplo de la pagina es con Vodka ^___^) y esmalte transparente.
You needa light color nail polish(that ishomegrownthatguesswith a dark colorwillnot seethe letters) cutsof newspaper, alcohol (the example of the site isVodka^___^)and transparent nail polish.
Pintar vuestras uñas del color elegido con dos capas y dejar secar.
Poner el alcohol en un vaso y cuando vuestras uñas esten secas mojarlas en él.
Colocar encima de las uñas los trozos de papel de periodico cortados anteriormente lo suficientemente grandes como para cubrir toda la uña.
Paintyournails of thewith two coatschosen colorand let dry.
Put thealcoholinto a glass andwhen yournailsare drydip themin itfor 5 seconds.
Retirar los trozos de papel lentamente y con cuidado.
Dejar secar y pintar con el esmalte transparente. Et voilà!!!
Removethe pieces ofpaper slowlyand carefully.
Let dryand paintwithtrasnparent nail polish.Etvoilà!
He encontrado muchas paginas con el mismo tutorial, parece que el original es este, si no es así y quereis que lo cambie sólo teneis que enviarme un mail y así lo haré
I found manypages withthe same tutorial, it seems that the originalis this,if notand you wantto change ityou just have tosend me amailand I will do.
Este cocktail encontrado en la pagina de la sirveparatodo Martha Stewart hecho con el Pimm's me ha recordado peliculas años '20 o cualquier partido de Badmington en la campaña inglesa. Prado de cesped, mesas blancas a la sombra y señoras con pamela.
Ingredientes para 6/8 personas:
cubitos de hielo
1/2 l. delimonada
250 ml. deginger ale 125 ml.dePimm's N°1 125 ml.de ginebra Rodajas de limónpara decorar Llenar una jarra con el hielo junto con todos los ingredientes, añadir rodajas de limon para decorar y servir frio (facil, eh?)
_______ _______
This cocktailfound on the websiteof the isgoodforeverythingMarthaStewartmade withPimm'sreminded me of20smoviesor anygameof badmintoninthe English countryside.Meadowgrass,white tablesin the shade andladies withpamela.
Ingredients for 6/8 people
Ice cubes
2 cups lemonade
1 cup ginger ale
1/2 cup Pimm's No. 1
1/2 cup gin
Lemon slices, for garnish Filla pitcherwith iceall the ingredientstogether, addlemonslicesfor garnishand servecold(easy, rigth?)
Hace un año, más o menos, un amigo me dio varios kilos de botones. Sí, sí habeis leido bien, kilos de botones. Desde entonces he tenido un monton de ideas para hacer algo con ellos, hoy he encontrado alguna solucion
_______ _______
A year agoor so,a friend gave meseveral kilosof buttons.Yes,you read that right, kilos of buttons.Since then I havea lotof ideasto do somethingwith them,today I foundsomesolution
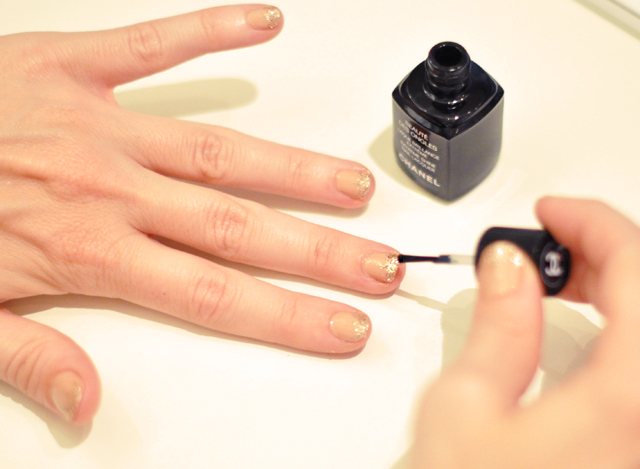
Sí yo soy de esas que se pintan las uñas. Me gustan las manos y los pies cuidados. Ya se sabe, la primera impresión es la que cuenta y los hay como yo que se fijan en estas cosas...
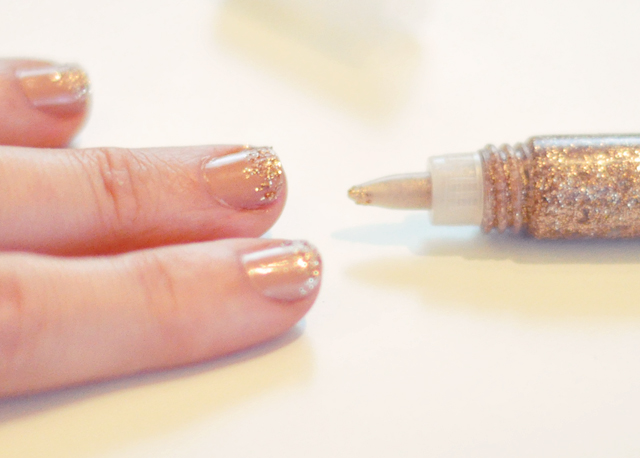
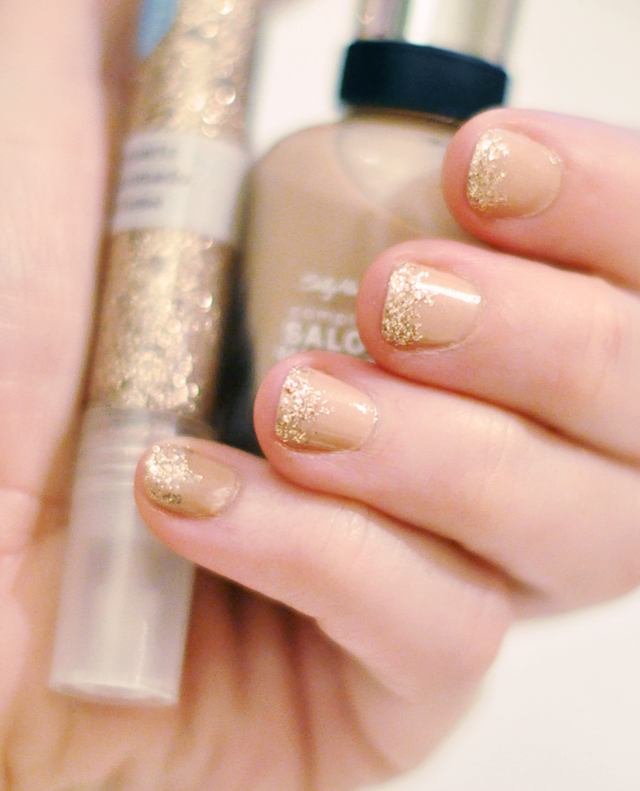
En general no amo las manicuras demasiado elaboradas pero esta de ...love Maegan me ha encantado, fácil y de efecto. Ahora sólo tengo que buscar la cola con purpurina (aunque no sea la de Martha Stewart) y hacer un par de pruebas.
_______ _______
Yes Iam one of thosewho paint hernails.I like thehandsand feetcare.You know,first impressionsare everythingand there are peoplelike methat lookthese things...
Generally notlovetoo elaboratemanicuresbut I loved thison...love Maegan, easyand effect.Now allI have to findthe glitter glue(although not theMarthaStewart)and make a coupleof tests.
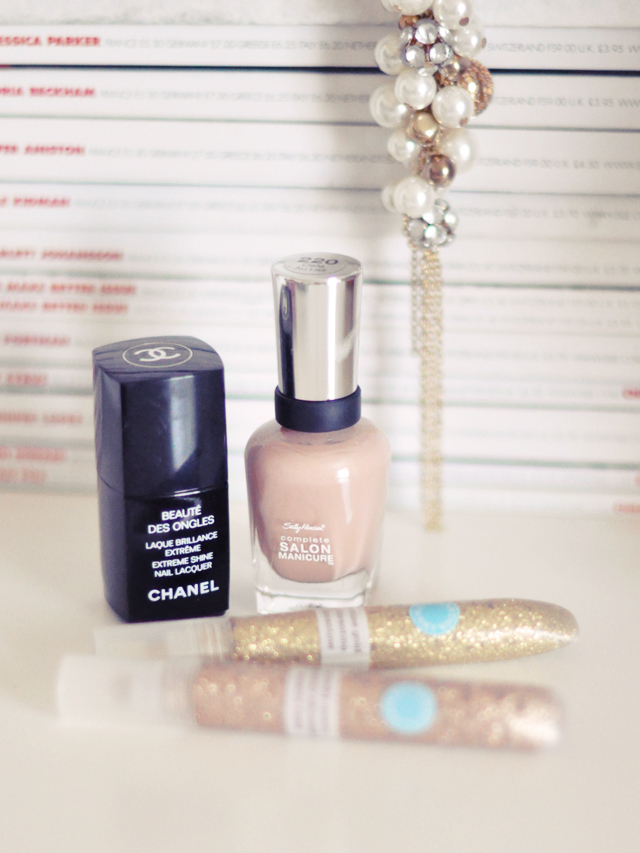
Debéis aplicar el color o la base antes de la cola (en este caso un fantastico color café con leche), dos capas de cola con purpurina y dos capas de brillo protector.
_______ _______
You mustapply the coat colorated or not (in this casea fantasticcafé au lait), two coats of glitter glueand two coats ofprotectiveshine.